Martus Documentation
When you install Martus, all the language versions of the user guide and quick start guide that are currently available are installed in your Martus\Docs directory. If you used the Windows installer, links to these documents are also available by going to Start > Programs > Martus. They are also available at https://martus.org/resources/documentation.html, and you can visit this site to see whether new language versions are available.
System Requirements
Windows
To display your system specifications in Windows, go to Start > Programs > Accessories > System Tools > System Information.
- Windows XP, Windows Vista, Windows 7, or Windows 8
- Pentium 233 MHz processor (300 MHz or faster recommended)
- 512 MB hard disk space available (1 GB or more recommended)
- Internet connection, to back up data to the Martus server
- To send records to a Martus Server, your Martus software must not be blocked by a firewall. If you have a software or hardware firewall, it must allow your computer to contact ports 987 or 443, on the Internet. If these ports are blocked when you try to select the server, you will see a message that the server is not responding.
- Screen resolution of 960x480 or greater
Mac OS
To display your system specifications in Mac, go to the Apple menu > About this Mac > More info… > System report… > Hardware (this is the Hardware Overview).
- Mac OS 10.7.3 (Lion) or higher
- Java Runtime Environment (JRE) version 1.8.0_40 or later (sometimes called Java8). The Java community is now supporting JavaFX instead of Swing, and in order to support a multi-lingual Martus, this requires Java8. You can check which version of Java is running on your machine by opening a terminal window and typing “java -version” (without the quotes) and hitting enter/return.
- 93 MB hard disk space available (100 MB or more recommended)
- 1GB RAM
- Internet connection, to back up data to the Martus server
- To send records to a Martus Server, your Martus software must not be blocked by a firewall. If you have a software or hardware firewall, it must allow your computer to contact ports 987 or 443, on the Internet. If these ports are blocked when you try to select the server, you will see a message that the server is not responding.
- Screen resolution of 960x480 or greater
Linux
Note: Linux does not fully support versions 5.1, 5.0, and 4.5 of Martus (there are several display issues, etc.). If you want to run Martus 5.1 on Linux, you need Java Runtime Environment (JRE) version 1.8.0_40 (sometimes called Java8) and graphic library gtk2 2.18+ (required for supporting JavaFX). For a fully supported version of Martus, download version 4.4 of Martus and refer to the version 4.3 Martus User Guide.
- Intel Pentium platform running Linux kernel v. 3.2 or later and glibc v. 2.14 or later
- Java Runtime Environment (JRE) version 1.8.0_40 (sometimes called Java8). The Java community is now supporting JavaFX instead of Swing, and in order to support a multi-lingual Martus, this requires Java8. You can check which version of Java is running on your machine by opening a terminal window and typing “java -version” (without the quotes) and hitting enter/return.
- 93 MB hard disk space available (100 MB or more recommended)
- 256 MB RAM (512 MB or more recommended)
- Internet connection, to back up data to the Martus server
- To send records to a Martus Server, your Martus software must not be blocked by a firewall. If you have a software or hardware firewall, it must allow your computer to contact ports 987 or 443, on the Internet. If these ports are blocked when you try to select the server, you will see a message that the server is not responding.
- At least 16-bit color mode with the KDE or the Gnome desktop recommended
Installing Martus
Download the Martus program and any new language packs from www.martus.org. Martus is continually improving; be sure to check for periodic upgrades available on the Martus website.
Windows
- Download Martus from Martus.org or insert a removable memory with the Martus installer. Double click .exe file to launch the installer.
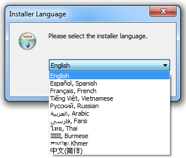
- Choose a setup language, and select OK.
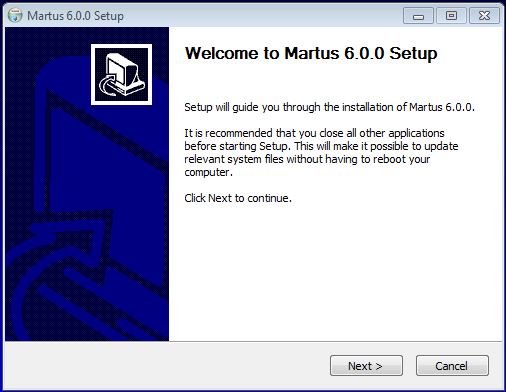
- Select Next and follow the NSIS Install Wizard instructions to install Martus.
- Decide whether you want to install a Martus shortcut in the Windows Start menu and/or on your desktop. Those that want their use of Martus to be less visible on their compute may want to click no for each of these.
Mac OS
Make sure that Java 8 is installed so that Martus will run properly. You may already have this or an older version of Java, but if you do not, you can download it at the Oracle website.
Automatic installation from a DMG file:
- Download the Martus DMG file from the Martus website or CD, and select the file.
- If the Martus folder was not automatically opened, double-click on it to view the contents.
- An “unknown developer” popup warning may appear, if so, right-click and select Open.
- While you can copy the Martus application (Martus.app) to your Applications folder, please note that if you do so, it will not be removed when you uninstall Martus, which may be a security concern. If you do not copy Martus to you Applications folder, you’ll need to open it from the DMG each time.
- The Martus Documentation folder contains files with helpful information about Martus, including User Guides, Quick Start Guides, and README files that describe the features in each version, all in various languages. We also suggest that you copy this folder to your computer where you can have easy access to it.
Installation from an ISO file:
Insert the Martus CD into your CD-ROM drive (or download the Martus .iso file from www.martus.org) and double-click it to find the DMG. Follow the DMG instructions above.
Note: If you are using a Martus Language Pack (e.g. Martus-en.mlp), please copy the mlp file to your Martus data folder. For instructions on how to access your Martus data folder, see Why can’t I find my Martus files on my Mac?
Linux
Note: Version 5.1 of Martus does not fully support Linux (there are several display issues, etc.). For a fully supported version of Martus, download version 4.4 of Martus and refer to the version 4.3 Martus User Guide.
The following instructions will install Martus within your user account only. No other Linux users on this machine will have access to Martus. If you want to install Martus publicly, so that any user on this computer can run it, please see Frequently Asked Questions. Most of the following must be done from a terminal command prompt.
- See what version of Java you are currently running by typing:
java -version
Java must be installed and in your PATH for this to work.
You must have (or install) either Oracle’s official Java version 1.8.0_40 (sometimes called Java8). If possible, we recommend using the standard software installation tools from your operating system, such as yum/rpm or apt/deb. If you want to run Oracle's JRE but it is not available that way, you can download it directly from http://java.com/
Note: To run Martus, you only need to install the current version of Java Runtime Environment (JRE), not the larger Java Developer’s Kit (JDK).
- Choose and create a directory to hold the Martus program files (i.e. a “Martus program directory”). This may be the same as the Martus data directory (~/.Martus/) or may be different. For example, you might install the Martus application within your Desktop directory, making it easy to find. Separating the program from the data may increase security, but will make it harder to entirely erase Martus if you needed to do so. You would make the directory by typing the following at the prompt in the location you choose:
mkdir -p < Martus Program Directory>
For example, if you wanted to install the Martus 4.0 into its data directory, you would type:
mkdir -p ~/.Martus
- If installing from the CD/ISO:
- Copy martus.jar from the root directory on the installation CD into the Martus program directory.
- Copy the LibExt directory from the CD into Martus program directory, and rename it as ThirdParty.
- If desired you can also copy the Documents directory which contains user documentation including the README files that contain a list of changes between versions of Martus.
- Change to the directory that contains the actual application, by typing the following:
cd < Martus Program Directory>
For example, if you installed Martus into its data directory, you would type:
cd ~/.Martus
- If installing from the zip file:
Change to the directory you created to install Martus into, extract the zip file contents there, and change to the directory that contains the actual application, by typing the following:
cd < Martus Program Directory>
unzip < Path to Zip File>
cd < Martus Version Directory>
For example, if you wanted to install the Martus 4.5 into its data directory, and the zip file was in ~/Downloads and named MartusClient- 4.5.zip, you would type:
cd ~/.Martus
unzip ~/Downloads/MartusClient- 4.5.zip
- Test the installation by running Martus, by typing:
java -jar `pwd`/martus.jar
(You do not have to type out the name of the directory you are in, since `pwd` does that for you. )
- You can create a shortcut script as follows:
echo java -jar martus.jar >martus
chmod +x martus
- You can copy this script elsewhere, or you can set up a launcher or shortcut to it, to make it easy to start Martus.
Running Martus in Linux
To start Martus in Linux, run a script you’ve created or type:
java -jar < Martus program directory>/martus.jar
Account Creation
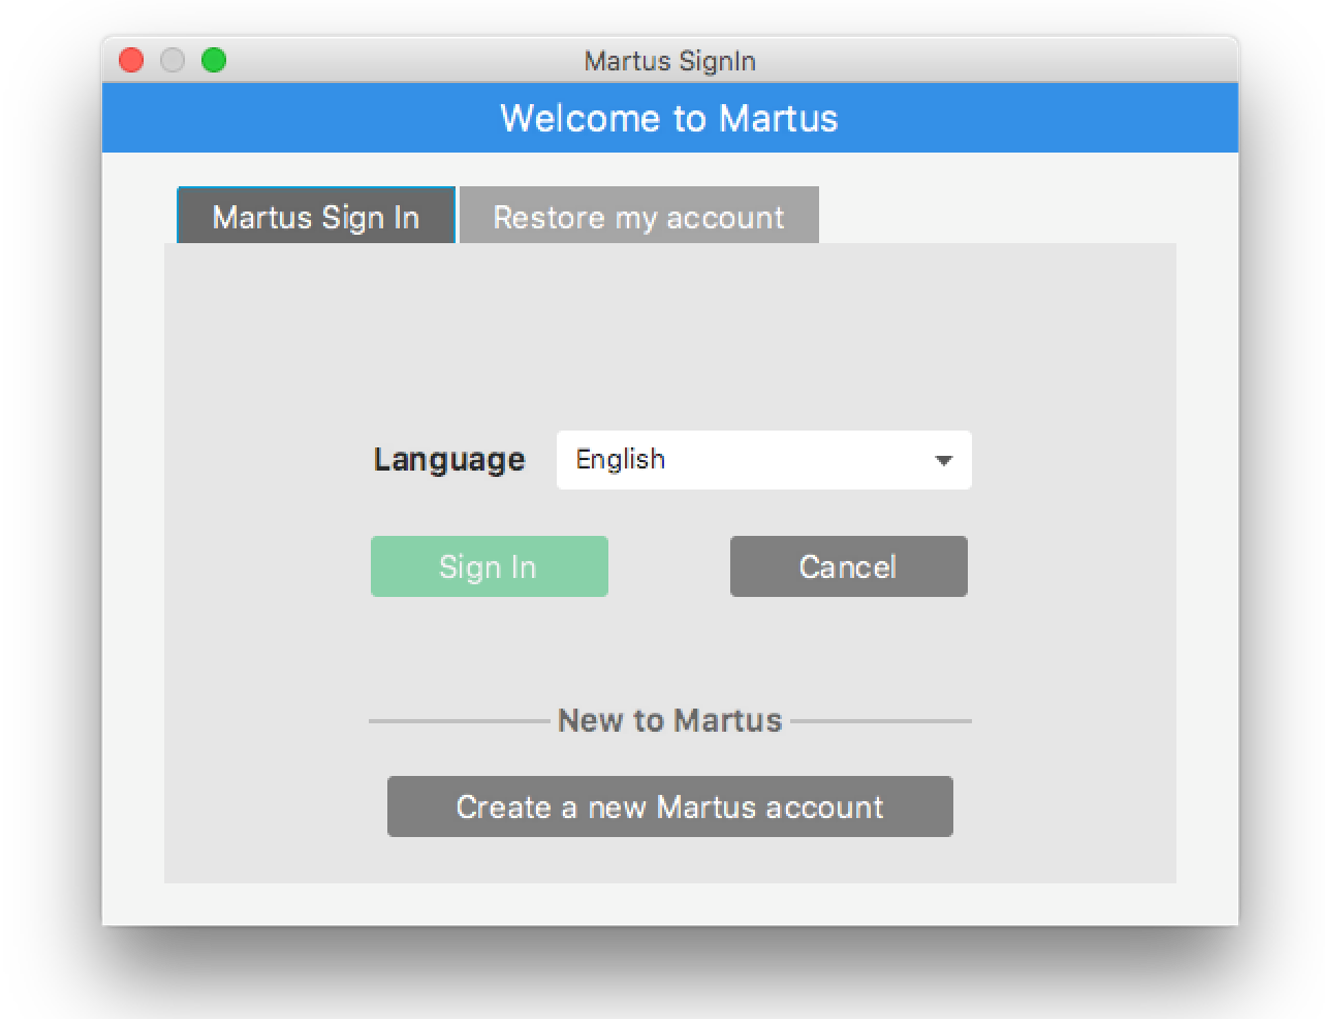
- Start Martus
- Select a language from the dropdown in the Martus SignIn dialog box.
- Select “Create a new Martus account?” and the setup wizard will walk you through account creation in 3 steps:
- Account
- Enter a unique user name. You can use capital letters, spaces, numbers and symbols. You will need to enter it exactly as it was written each time. Your user name is for log-in purposes only, no other users will see it.
- The password is the most important security feature of Martus set by the user. A strong password is long, unique, and something you can remember but others won’t be able to guess. See Creating strong passwords.
- Enter Author and Organization information for yourself. These are default values that appear on each record. By entering them here you do not have to write them each time you create a new record. You can always change the default or edit the information that appears on individual records.
- Settings
- The “default” server is in Ireland, with backup/mirror to Brazil. (Reminder that all data is encrypted such that server operators/Benetech/hackers cannot read.)
- Or you can use another server set-up. For more information on how this works see Administering your own Martus Server
- Remember that backup can also happen without internet on external drives, if done regularly and off-site, by dragging and dropping .mba files (exported encrypted Martus records) in and out or by backing up your entire Martus directory. (Contacts still must be configured in order to read exported encrypted records). For more details on using Martus with limited internet access and/or low bandwidth see Using Martus without internet/limited access.
- Finish
- A Martus account is secured with username, password and key. The key is a file containing a unique key to your account that unlocks (i.e. deciphers and unencrypts) your data. An encryption key is really difficult and resource-heavy to crack.
- Benetech cannot recover your account so making sure you can access your data is up to the user.
- What's the first thing you do when you move into a new home? You make a copy of your key and you put it somewhere safe, not inside your new home.
- Your key is a .dat file that lives on your computer in your Martus directory and is what lets you into your account; it is associated with your specific username/password pair.
- You can create a backup key that doesn’t depend on your password from the main Martus workspace.
Create you account by entering a username and password.
Select your server settings by choosing the default server network provided by Martus or another "private" server set up.
Finish setting up you account by backing up you key.
Note: Key backup is extremely important. See Backing up your Key for more details.
Your account is now complete. For orientation to the main workspace see below or the Quickstart Guide.
The next time you open Martus, input your username and password in the Martus Sign In dialog box to access your account.
Getting to know the Martus Workspace
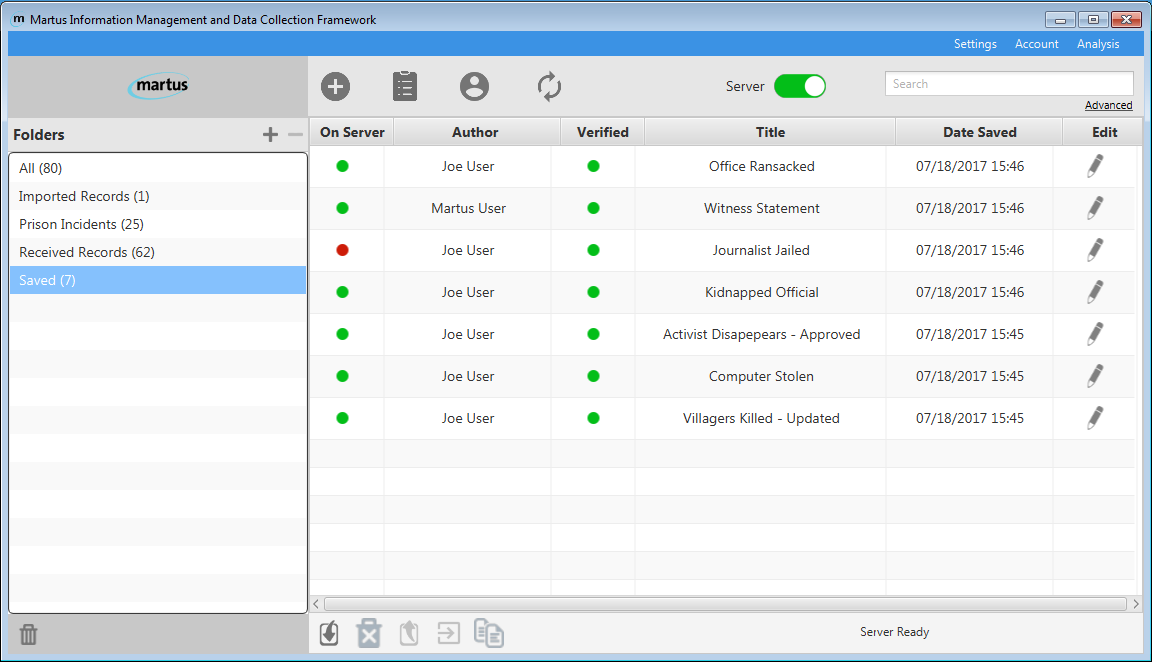
The Main Taskbar
- Create a record
 with the click of a button!
 - Use the Template Manager
 to upload, download, and edit customized form templates.
 - The Contact Manager
 allows you to add or administer connections with other Martus users.
 - Upload and download records using the Sync Manager
 .
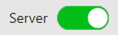
. - Toggle your Server connection On and Off:
- Perform a simple text Search across all of your records:

The Record List Pane
- Sort your records by multiple fields:
- On Server (indicates whether or not the record has been saved to your configured server)
- Author
- Verified (indicates whether the record was created by a contact that you have verified)
- Title
- Date Saved
- View records by double clicking and Edit
 at your convenience.
 - Select records to Delete
 , Import
  , Export
  , Move
  or Copy
  .
.
The Sidebar
- Customize and organize your folders with the Add
 and Delete
  options. Double click a folder to change the name.
 - Manage deleted records in the Trash
 .
.
Drop Down Menus
- Settings allows you to adjust Server Settings and System Preferences.
- Account contains Account and Author Information , options to Manage Contacts , make a Key Backup and Delete Account.
- Analysis contains options for Reports, Graphs and Advanced Search.
The Martus main page is slow to appear.
I'm running Martus, but I can’t find the Martus window. How can I find it?
Creating Records
- Select Create new record .
- Input information in the relevant record fields. The record header includes general options:
- Record Details shows the public code of author, date created and modified for the record.
- Select a Template from the dropdown menu to choose the form you would like to use for your record.
- Title is like the subject of an email, it is what will help you distinguish one record from another.
- Use the To field to add contacts with whom you want to share the record.
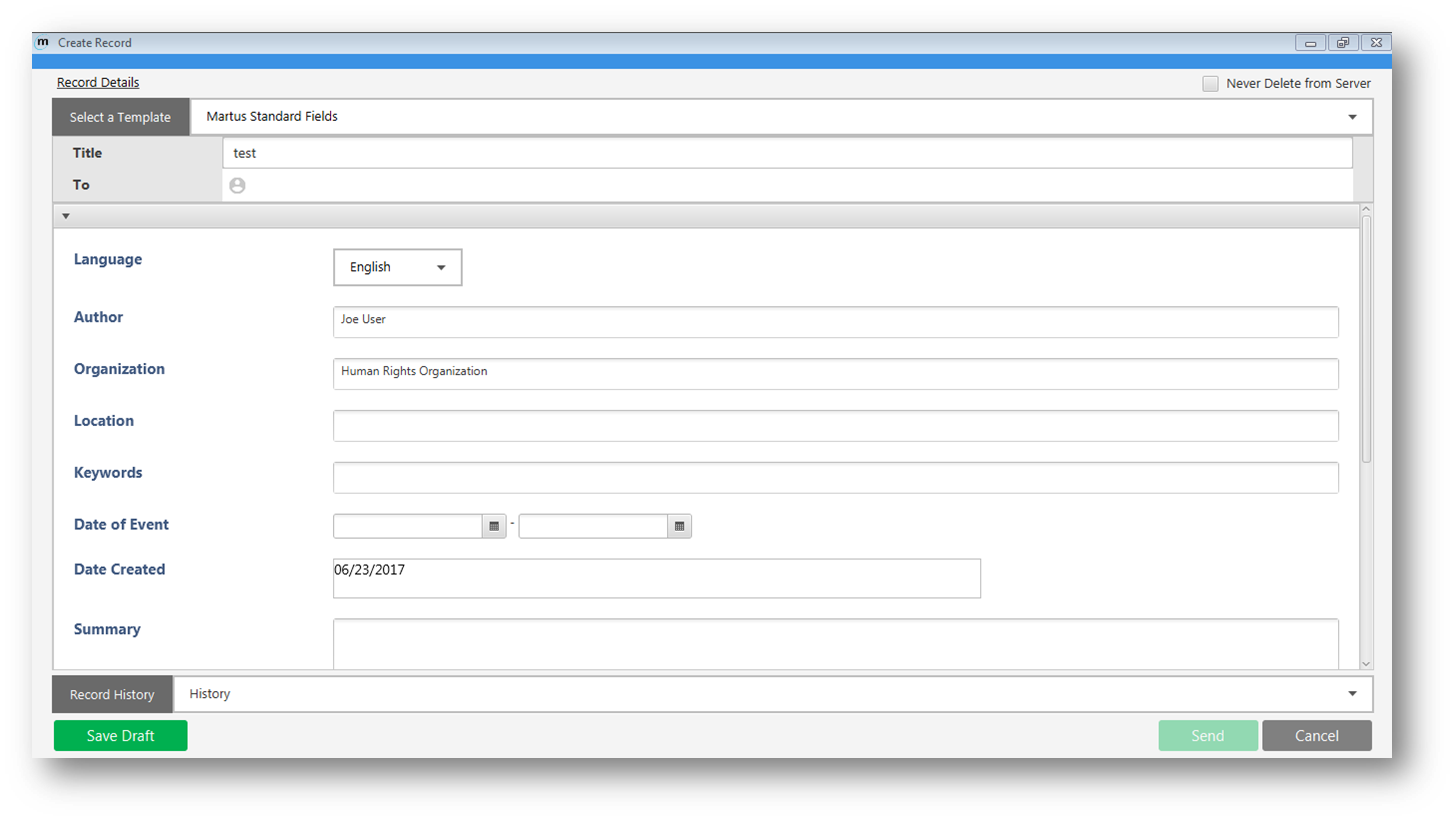
- All Martus templates will include standard fields, these are:
- Language - Choose the language you’re using to describe the event. If you are using a language that isn’t included in the list, choose Other. You can type your record in any language, regardless of the language selected for the user interface.
- Author - The Author name from your contact information appears here, but you can change it.
- Organization – The Organization name from your contact information appears here, but you can change it.
- Location - Type the location of the event. Depending on the scope of the event, you may enter a country, region, city, or other location. If it doesn’t make sense to enter a location, leave the field blank.
- Keywords - Type words that are synonyms for acts you described in the record, other related words, and alternative location names, if appropriate. This is especially helpful for searching.
- Date of Event - Enter the date of the event you’re reporting. Leave the date as Unknown if you are uncertain when the event occurred.
- To include Attachments (any file, any size, any number), click Add and then select the file you want to attach. The constraints on attachments are those specific to your device and connection speed – a large attachment may take an unreasonable amount of time to upload on a slow connection.
- Choose Save Draft to save the record for yourself or Send to share with the contacts added to the record. Choose Cancel to close the record without saving any changes.
- Record History is a dropdown that shows previous versions of the record as well as the date and time they were saved. Select + Save as a new version to save your changes and also keep a copy of the previous verion in the record history.
- Martus automatically saves backup copies of saved, versioned and shared records to the Martus server as long as your configured server is set to ON in the Martus main taskbar.
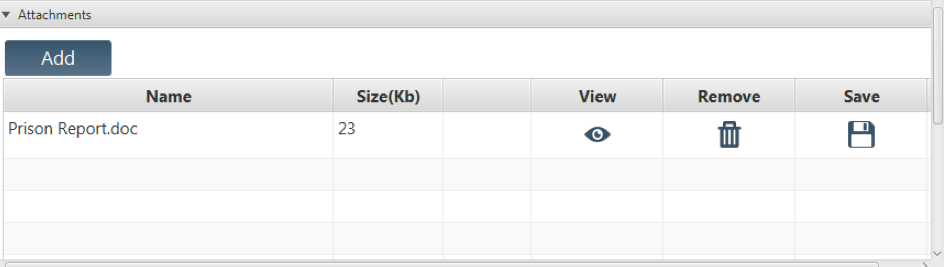
Manage Attachments
View an Attachment
When creating, editing or viewing a record with an attachment:
- Select the Attachments tab within the record window.
- Select the View icon,
 , for the appropriate attachment.
If the attachment is an image (e.g. photo or scanned document) of certain file types (i.e. jpg, png, gif), the image will be displayed as a thumbnail and in a View Attachment window. Other types of files will be opened outside of Martus by the program you have set on your computer to open that type of file.
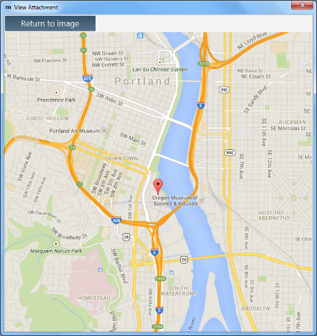
For image attachments with associated geo-location meta-data, select Show on Map to view the location the image was taken on a map.
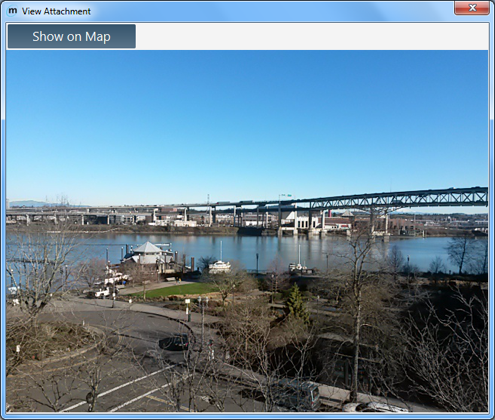
Note: Using the Show on Map function will bypass embedded Tor if you have it turned on.
- Select Return to image to exit the map.
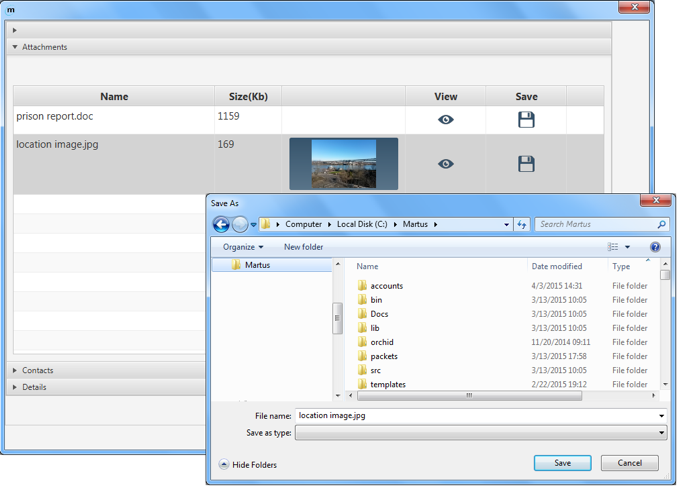
Save an Attachment
When creating, editing or viewing a record with an attachment:
- Select the Attachments tab within the record window.
- Select the Save icon,
 , for the appropriate attachment.
 - Choose a location to store the attachment and select Save.
Delete an Attachment
- Select the Attachments tab within the record window.
- Select the Remove icon,
 , for the appropriate attachment.
Saving, Editing and Versioning Records
Save a Record
Selecting Save Draft once you have created a record saves it locally as long as your configured server is set to ON in the Martus main taskbar. If you edit an existing record, Save Draft modifies the original record without creating a new version of that record. Once you edit click Save Draft, you cannot restore the previous version of the record. If you would like to would like to be able to restore previous versions of a record, see Version a Record below.
- Choose Create new record or Edit a record and input data.
- Select Save Draft.
Version a Record
Versioning a record allows you to update information in the record but keep older versions intact, and prevents the earlier versions of the record from being edited. Versions of each record are connected, creating a new copy does not increase the total number of records (e.g., in searches).
- Choose Create new record or Edit a record and input data.
- In the Record History dropdown menu select + Save as a new version.
Alternately, you can create a copy of a record to use as a starting point for a new record.
View earlier versions of a record
You can view any version of a record on your computer. However, you can only make changes to a new version.
- Select the desired record and choose the Edit icon for that record.
- Select the History dropdown at the bottom of the record.
- Select the record version you would like to view from the list. A separate window will display the past record version.
- Select OK to exit to the Create Record window.
Note: If you are allowed to retrieve records from a Contact and you didn’t have access to an earlier version of a Contact’s record, Martus will list the earlier version in the record details, but it won’t retrieve that version of the record to your computer.
Permanently save a record
To ensure that a record is never permanently deleted from the server, even if it is deleted from your local device, Martus offers the option to - individually or as a default - never delete records from your configured backup server.
Permanently Save Records to the Server by Default
- Select Settings > System Preferences.
- Check Never Delete from Server.
- Select Save Changes.
Permanently Save Individual Records to the Server
- Choose Create new record or Edit a record and input data.
- Select the checkbox Never Delete from Server in the upper right.
- Choose to Save Draft or Send.
Edit a record
- Select the record that you would like to edit.
- Choose the corresponding Edit icon .
- Input/change any record data.
- Choose to Save Draft or Send.
Tip: Consider changing the title of the modified version of the record in a way that makes it clear that it contains corrected or additional information. For example, if the original versioned record is titled “Political leaders jailed,” you might title the modified version “Political leaders jailed – updated.”
Discard changes
To discard the information you’ve entered in a record, click Cancel. Martus alerts you that you’ll be deleting any unsaved information in the record, since it was last saved. Click Yes to discard the unsaved information permanently. (If you click Cancel when you’re modifying a record, the record will revert to the state it was in when you opened it).